Photomatix Pro Tutorial: The Basics
In this tutorial, you will learn how to create a High Dynamic Range (HDR) image using three photographs of the same scene taken under different exposures, and how to process the HDR image in order to reveal its details in highlights and shadows.
HDR images contain more detail in bright and dark areas than ordinary images. However, because of its large dynamic range, an HDR image does not look "correct" when displayed on your monitor. With Photomatix, you can process this HDR image for output on a printer or for display on a monitor.
Step 1: Taking photos of an HDR scene
To create the best HDR images, you need to take enough exposures to properly cover the dynamic range of the scene.

If your camera offers Auto-Exposure Bracketing (AEB), select the Continuous Shooting mode, make sure the camera is set to
Aperture Priority, and select an exposure increment of +/-2. The camera will automatically vary the shutter speed each time the shutter button is pressed, taking several exposures spaced by two-stop increments.
You may have to change the exposures manually if your camera does not bracket in steps greater than 1, or if it can only take 3 auto-bracketed frames when the dynamic range of the scene requires 5 or more.
Photomatix enables you to align images if the camera moved slightly between frames, but using a tripod is still recommended.
Step 2: Load your differently exposed photos
The easiest way to load your bracketed photographs is to select the files with the Finder and drag them to the Photomatix icon on your Dock.
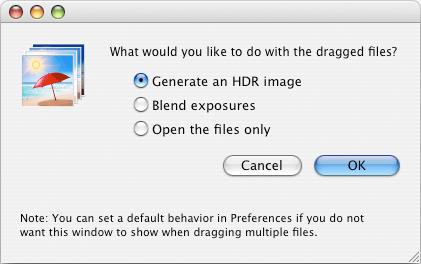
You will then get a dialog asking you what you would like to do with the dragged files. Select
Generate an HDR image and click on
OK.
The next dialog lists the files selected. If necessary, you can remove files or select others.

You can also directly access the dialog to select source images by either clicking on the
Create HDR image button on the
Workflow Shortcuts panel, or going to the
Process menu and clicking on
Generate HDR.
Click on
OK to go to the next step
Step 3: Generate the HDR image
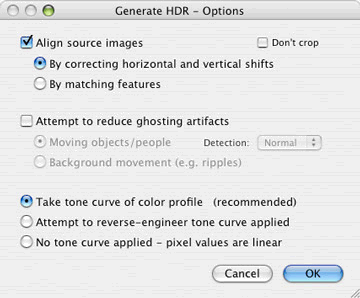
The next window lets you specify options for creating the HDR image.
The three photos of the Grand Canal were taken using a tripod, but we still check the
Align source images option to correct for small alignment problems that may happen even with a tripod. For hand-held images, it would have been worth trying the other alignment method "By matching features".
Click on
OK.
Photomatix will now merge your differently exposed photographs into a single HDR image that represents the complete tonal range captured by the photos.
 Step 4a: Prepare the HDR image for output
The generated HDR image looks disappointing... This is because it can't be represented properly on screen without further processing.
An unprocessed HDR image is in a way similar to a film negative, or the RAW file of a digital camera. It needs further processing for display or printing. In Photomatix, this processing is called Tone Mapping.
Tone mapping reveals the details in highlights and shadows contained in the original HDR image. It converts the HDR image in 32 bits/channel mode into an image in 16 or 8 bits/channel mode that can be saved as TIFF or JPEG.
To tone map your HDR image, click on the
Tone Mapping button on the
HDR viewer window.
Note: Before processing through Tone Mapping, you may want to save the HDR image using the
Save HDR As from the
File menu. This allows you to process the same HDR image in different ways later on.
 Tone Mapping
 Exposure Blending
Url to this pages:
http://nade.dk/web/nade/site.nsf/FramesetHP?readform&wmain=files/Photomatrix_Tutorial