The famous high key effect is one of the most interesting, yet simple, effects you can achieve in digital photography and there are many ways to accomplish it, as Takui Neko explains.
Ideally you should start out with a good high key image direct from your camera, using lighting and exposure techniques, but if this is not possible you can transform images into high key using Photoshop.
In this tutorial we will look at two different methods of creating the effect digitally.
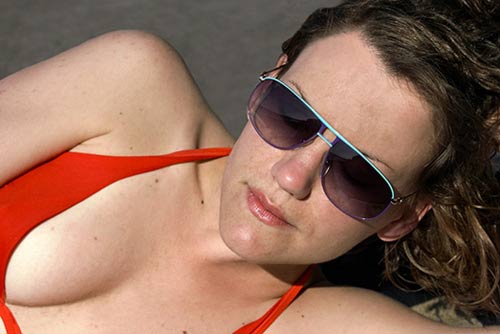
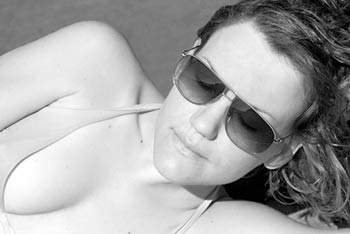
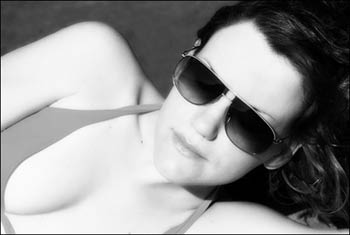
We will start with a colour image, feel free to download this (right click and choose "Save picture as" from the menu) and use it for learning purposes. Note that this is not a high key image, but was chosen because it's more of a challenge.
| Technique One: High key black & white with red filter
This is a technique that emulates what a photographer would do when shooting black & white film with a red filter and increase the exposure by two stops. In Photoshop we do it slightly different.
First, go to your channels palette and make the red channel active. | 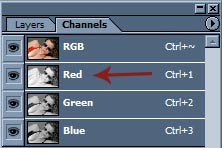 |
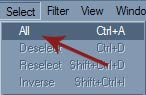 | Use Select All (Ctrl+A), Copy (Ctrl+C) and then Paste (Ctrl+V) into your Layers Palette, on top of your original image. Be sure to deactivate the Red Channel and activate the RGB one before pasting. | 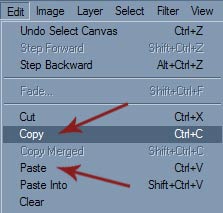 |
Now you should have something like this:
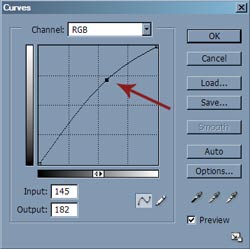 | Now, make a Curves Adjustment Layer - Layer>New Adjustment Layer>Curves - Click in the centre of the curve and drag towards the upper left corner. Make sure Preview is ticked and then you can adjust until you get the desired effect. |
To get something like this, in this case, to my taste.
| First we use the Burn Tool set to shadows at 10% and darken to taste with a soft brush and then we do the same with the Dodge Tool set to highlights.
Do the Burn and then duplicate again and do the Dodge, or just duplicate and work in a new layer every time you wish to add or change something for safety reasons.
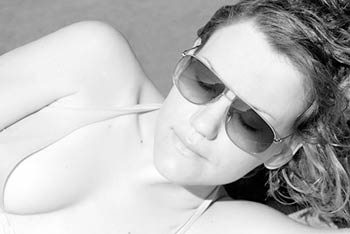
After making adjustments I ended up with this. | 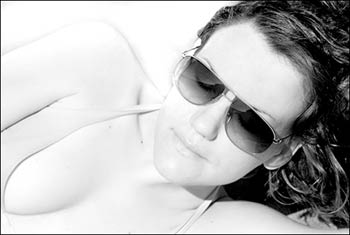 |
Tip: If when using the Highlight tool you get too strong a difference in shades or start losing details, try Dodge set to Midtones instead, at 3% or 5% and go several times over the area until shades are blended properly.
| Also you can do some variations, this one, for instance, to make it more dramatic and sharp looking, by adjusting contrast either using Levels or Curves or just with the Burn/Dodge tools, which I prefer. | 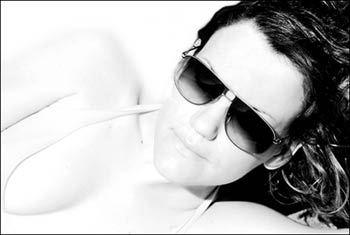 |
| Technique Two: Katie Arndt’s Technique
This is a very simple, yet effective, method that I like a lot for its straightforwardness and inspiring effects.
We start with the same image and change it to black & white using a Channel Mixer Adjustment Layer (same procedure as for Curves above). Before you start adjusting the sliders tick the Monochrome option. In this example we will use the following settings: Red=65, Green=35, Blue=0 | 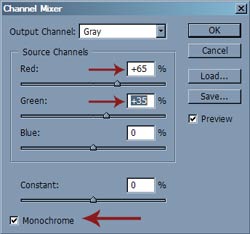 |
You should have an image like this

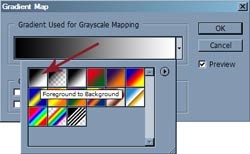
| Now add a Gradient Map Adjustment Layer (same procedure as with the Curves or Channel Mixer), on top of your Channel Mixer Adjustment Layer, choosing the gradient that goes from White to Black.
This step will give a more fashion like soft contrast to your image.
|  |
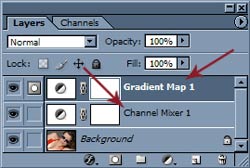 | This is how your Layers Palette should now look. |
And the result is like this

 |  Duplicate the Background Image, set the Blending Mode to Overlay and apply Gaussian Blur to taste. Duplicate the Background Image, set the Blending Mode to Overlay and apply Gaussian Blur to taste.
Be aware that you can, if you wish, after the Gaussian Blur, use a Curves Adjustment Layer to fine tune your high key effect. |
 Here is the result by Katie Arndt using this technique, including the Curves Adjustment Layer., one was shown to me by photographer and digital artist, Katie Arndt, so credit goes to her.
Try mixing techniques, add white layers on top, set blending modes, there is an infinite amount of High Key effects you can achive.
I look forward to seeing your high key images!
Words and pictures: © Takui Neko 2004-2005 and Katie Arndt 2005.
Url to this pages:
http://nade.dk/web/nade/site.nsf/FramesetHP?readform&wmain=files/Black_&_White_High_Key_Effects_In_Photoshop_Technique