-RyanVM for windows update slipstreaming
-Nlite for automating and tweaking
-Driverpacks for drivers
-WPI (Windows Post Installer) for installing enduser software and registry tweaks.
-Nlite for createing / burning the ISO
Installed in that order is important too
MSFN is a great source of general info check it out
http://unattended.msfn.org/unattended.xp/
 Welcome to DriverPacks Tutorial.
You want to integrate drivers into Windows Setup and found out manually integrating a driver is tedious and unforgiving work.
We like it the other way. We want Windows and Hardware setup made easy.
DriverPacks are driver collection archives.
The DriverPacks project Team make these archives ready for integration.
DPsBASE utility will integrate DP archives into a local 32-bit Windows 2000, XP or Server 2003 source.
64-Bit versions are not supported.
DPsBASE can also make a BartPE Mass Storage plugin For your UBCD4WIN .
OverFlow wrote a guide on how to use the BartPE Plugin option.
In this Tutorial we show how to put a selection of DriverPacks into a source for DISC install.
We were using a Windows XP SP2 CD-ROM as source, and DPsBASE 7.05.2.
Before we start, there are a few items you will need.
* A Local Windows source (This is a copy of the original Windows CD in a folder on your hard disk.)
* DPsBASE self-extracting archive (Download here)
* DriverPacks for your hardware (Download here )
* (Optional) 7Zip. For making or modifying driverpacks. It's a useful free Zip tool. (Download here. )
It is highly recommended you use either nLite or the RyanVM Integrator to slipstream the latest Service pack and/or current hotfixes before you run DPsBASE.
These programs can help you create a secure, up-to-date Windows install disc.
Updating your source to the current service pack is a requirement for quite a few drivers.
Ryan Vandermeulen and Siginet told us that when you use nLite and RVM, you better do nLite after RVM, and then do DriverPacks.
I will recommend you work in stages and keep copies of earlier stages of the build. A copy to fall back to can save you lots of time.
Please refer to the above web sites for detailed instructions for those programs.
More advanced users find some extra info in this tutorial, and beginners will surely benefit by reading about what advanced users could do.
CAUTION
Once driverpacks are integrated you cannot integrate hotfixes without breaking the driverpacks.
LET's START.
1) First, copy your Windows CD to a folder.
It is your option to first use RVM Integrator and/or nLite on it.
When you use nLite or RVM, do not (yet) make an ISO. Do not use nLite to integrate uncompressed DriverPacks as they are not going to be correctly processed during windows setup.
Used properly, your local Windows source could be slimmed down and updated before you run DPsBASE.. When you have DVD, there is no space requirement forcing you to slim it down.
DPsBASE cannot slipstream into ISO files and cannot make an ISO file for you. After DPsBASE integrated the DriverPacks, you can make an ISO if you want to use one.
If you have a WINNT.SIF answer file ready for use, put it in the i386 folder before you run DPsBASE.
DPsBASE will write a few lines into an existing WINNT.SIF or, if there is no such file, creates a WINNT.SIF file with the lines it requires. It also writes to other files and puts drivers and some install helpers in place for you. This is the main reason we recommend DPsBASE is used as last integration tool. These changes are required for proper driver installation during Windows Setup. DPsBASE makes a backup of files it changes or replaces.
Other than a couple Mass Storage files DriverPacks do not replace drivers natively present in windows setup.
If you remove windows native drivers with Nlite and need them, you know what you did and shouldn't blame us.
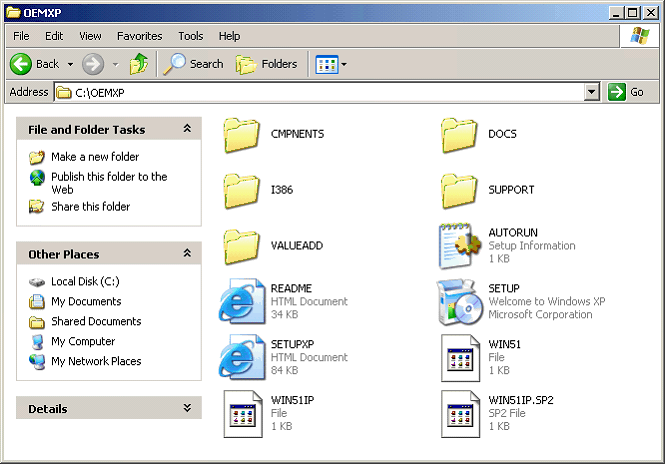
In this example, you can see that the copy of the CD is located at C:\OEMXP.
2) Next, put your Driverpacks Base self-extracting archive someplace convenient (i.e. C:\Driverpacks\).
We show version 7.05.2 here. The numbers mean something. 7 (for 2007) / 05 (May) / and 2 for revision 2
The name will always have a minimum of three numbers for version.
DPsBASE utility was revised twice during May, therefore, 7052.
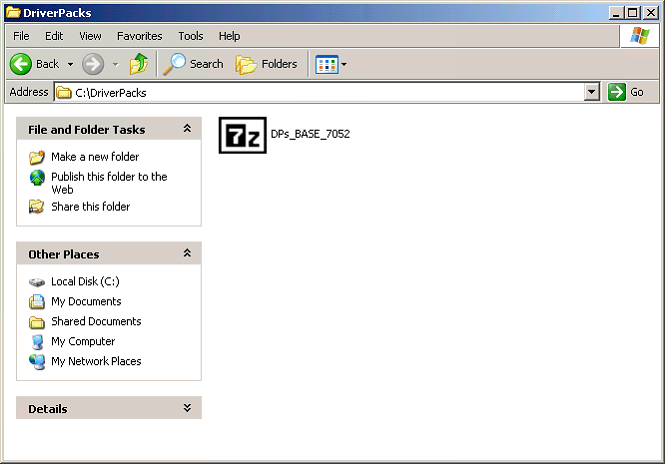
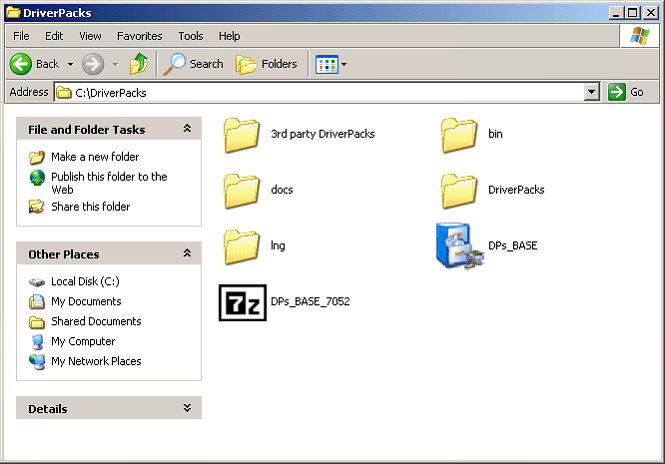
3) Then, double click the DPs_BASE_7052.exe file and allow it to extract in the folder you picked.
It makes a new DriverPacks and 3rd party Driverpacks Folder where you will put your downloads in.
 ,
,
It also extracted the utility itself. You will find a nice blue icon. Hmm, are those driver CDs?
4) Now, copy or download any driverpacks you need for your hardware to the new directory it has created.
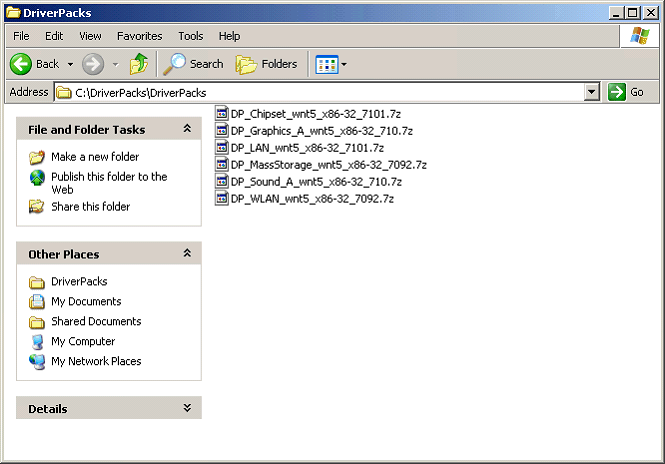
The Main DriverPacks go to [C:\Driverpacks\Driverpacks\]
You can read about the supported hardware list on the overview or download pages and select those you want, or go crazy and download them all! You can still select which you want to integrate later on.
Unless you want to modify a pack you do not need to unzip the DriverPacks. Leave them as *.7z files.
An advanced user may want to modify a DriverPack and can do so. These users can find more information in the forums and device lists.
A few words of advice are in order here.
The DriverPacks folders MERGE, so modifying ONE pack without looking at the folder structure of the others, CAN break the system.
This could be the case in split packs (For instance; Graphics and Sound are Split.).
You can also remove drivers from the DriverPacks folders. Just bear in mind most DriverPacks have an INI file packed alongside with it to make things work.
When you remove a folder you have to look at that Pack's INI, and remove the section for that folder.
In Mass Storage, the advanced user could enable a windows 2000 driver he needs, move sections to change load order, or add a driver and section to the INI (In which case you really ought to tell the team what problem you had to solve and how you did it, and which driver you used.).
If you want to use 3rd Party DriverPacks, made by yourself or others, put them in the [\3rd party DriverPacks\] folder.
Check the 3rd party driverpacks forum. Someone else may have already built a driverpack for your situation, or could use your driver.
When you place them in the wrong folder, they are not used.
Do NOT put a Mass storage driver required for TXTmode hard drive detection in a Third Party Pack.
When you have put the downloaded DriverPack files in the DriverPacks folder, it could look like this.
5) Now, go up a level and in there double-click the "DPs_BASE.exe" program file (The blue Icon.) and get ready for some magic!
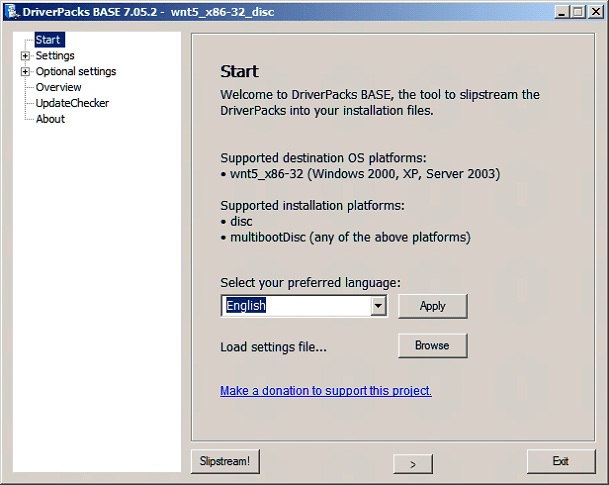
On the below screen you can select your language, load any previously saved settings, go straight to slipstream (if your settings are already set), make a donation (A lot of work went into this utility), or progress to the next settings step (right arrow).
We assume you use this for the first time, so for now, press the right arrow button twice.
6) In the below screen you can select Select what type of Windows source you are building.
Typically select "disc" option unless you are building an advanced multi boot source or a BartPE Plugin.
Then select your Windows source directory by pressing the "Browse" button.
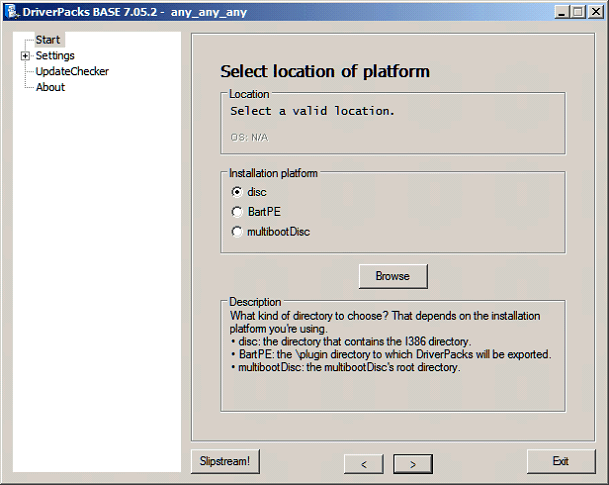
(In our example, that source is located at C:\OEMXP. It contains the i386 folder.)
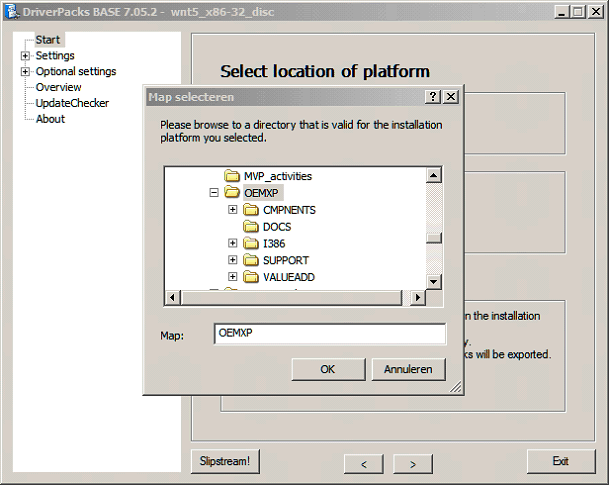
Click OK when you got it. It will examine that source folder and show you its findings.
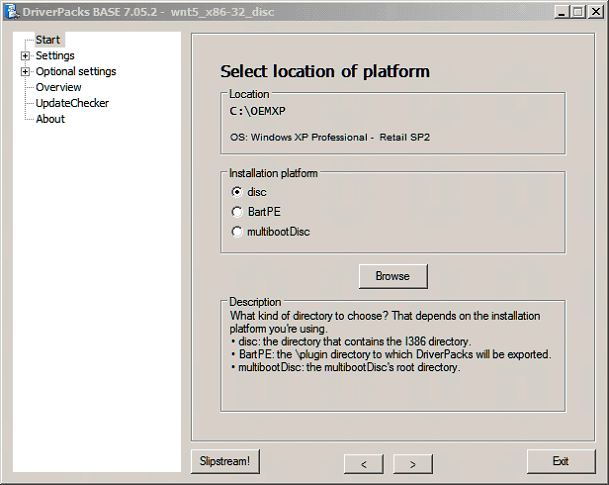
Then click the right arrow button again.
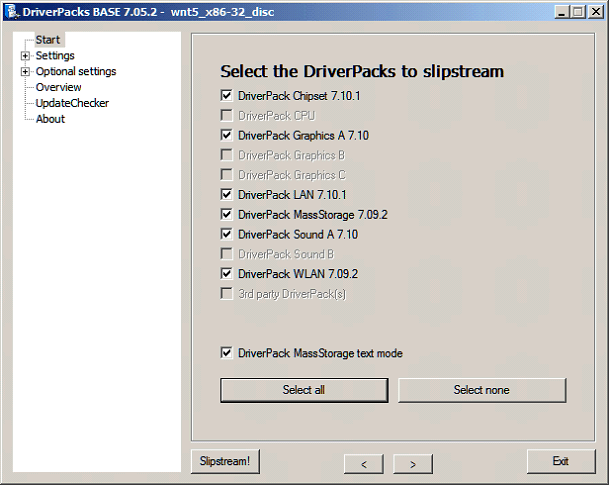
7) Next, in the below screen, you can select which driverpacks you want to integrate.
If you don't have a driverpack available, that option will be greyed-out.
Which are the most important to you?
That depends on your Windows CD usage. If you plan on making a "universal" install CD for different platforms, just select all the driverpacks; you never know what hardware you're going to come across!
On the other hand, if you know specifically what hardware you will install Windows on, make sure to read the descriptions for each pack and only select the ones applicable to your hardware (to save space on the CD).
We should begin with Mass Storage.
If you previously had to hit F6 with a driver on Floppy to get access to your hard disk during Windows setup, make sure you select the Mass-Storage driverpack and check the "Text-Mode" option.
Text-Mode needs Mass Storage drivers, so the Mass storage Pack has to be present.
DPsBASE will integrate the Mass Storage driverPack after which your Disc will load a lot more IDE, RAID, SATA, SAS and SCSI controller drivers prior to installation.
The Windows install disc you build can then identify the controller and access your hard disk.
In other words, TEXT-MODE is required if the Windows installer CD does not recognize your destination hard drive.
Selecting Text-Mode most often means "Bye Bye, Floppy".
Unfortunately, Windows 2000 has a memory limit, so we had to make it skip many for Windows 2000. You CAN re-enable those you want but you will have to disable others then.
(We posted a really advanced txt in FAQ about customising Mass storage, and you can always politely ask at the forum. We'll tell you how.You will need 7-zip.)
Some controller chips have more than one mode and we included support for all modes.
This means they have a load order. The section for a popular mode for some type of chip we made load last is sometimes reported as the one taking the task when the chip is set to other mode in BIOS. (Which should not happen but happens). IF your machines are affected by "wrong" mode load, it can result in a BSOD.
You can change the load order with an edit in DriverPack_MassStorage_wnt5_x86-32.ini
(You can also edit out the wrong mode section.)
The Chipset is a critically important part of your computer. In a non-integrated Windows installation, the chipset driver is normally installed before you install any other drivers.
You will often find that other drivers cannot be properly installed if chipset drivers are not yet in place.
Graphics drivers ensure correct resolutions are displayed. LAN is used for connectivity, and who wants to be without Sound? Wireless LAN was also selected.
When we chose our packs for this tutorial, we did not need a 3rd Party DriverPack (Modem came to mind.).
If you put any downloaded 3rd Party, or Packs you built yourself, in [\3rd party DriverPacks] folder and selected to load them, you would not see individual 3rd Party Packs listed here.
For 3rd Party, it's all or nothing, so be mindful about what you placed in the [\3rd party DriverPacks\] folder.
( Mass storage drivers DO NOT BELONG in 3rd party DriverPack folder. TextMode will not use these.)
When you have more than one version of a pack in the folders DPsBASE will use what it thinks is the latest version .
However, 70422 is lower than 7043 even if 70422 is from a later date.
Released DriverPacks normally do not have Five digits but a Test version might use a "date stamp" like 70425 in the name.
Also bear in mind that 3rd Party Pack creators adopted the Date Stamp version system.
You can rename the archive, or move its predecessor out of the folder.
Have you made your selection? Press the right arrow button.
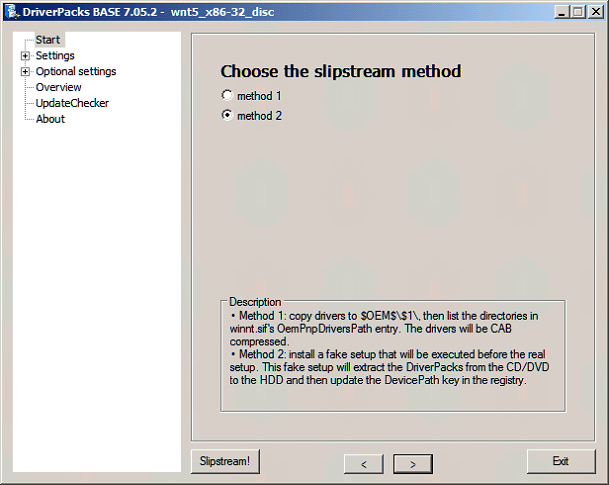
8) In the below screen you can select between Method 1 and Method 2. Read the description in the window.
Method 2 is selected by default and this has a reason.
First of all, Method Two takes much less time to integrate, and uses less space on the disc..
More important is that in Method 1 a Path is written to tell Windows where the drivers are at.
When you want to integrate a LOT of drivers, Method 1 can write a path longer than a string length limitation present in Windows, and those drivers that get referenced after this limit was reached, will not get used by Windows.
DPsBASE tells you when you got over that limit.
A DVD built from a Method 1 streamed source can be quite useful, though. I timed Setup with M1 and M2 and it was really close.
M1 slips can be done to UPGRADE CD sources. M1 slips also make awesome driver repository discs you can use to install drivers after a vanilla install.
In the new DPsBase (804, in testing.. See The NEWS.) we include a new Microsoft DPinst tool launcher as well.
This can do driver setup from the driverpacks you put on the disc without using windows setup.
Warm Snow posted a tool to use our DriverPacks with Microsoft's DPinst, so nowadays you can make integrated setup discs and driver-install pendrives or CDR..
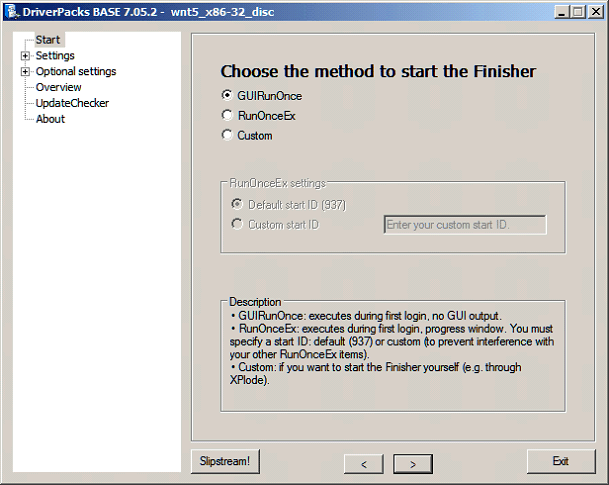
9) In the below screen you can select when you want the Driverpacks Finisher to run. Read the description for each option. GUIRunOnce is selected by default.
10) In the below screen you can select if you want to "Keep The Drivers ".
KTD is beneficial if you plan on swapping hardware (a hardware test bed) since this leaves all the driverpacks uncompressed on your Windows destination [C:\Windows\Drivers\] and Windows gets told where they are.
Read the description for more info. KTD is disabled by default. (It adds approx 6 minutes to windows setup.).
The new DPinst tool in DPsBase will also use KTD if you set that option during slipstream..
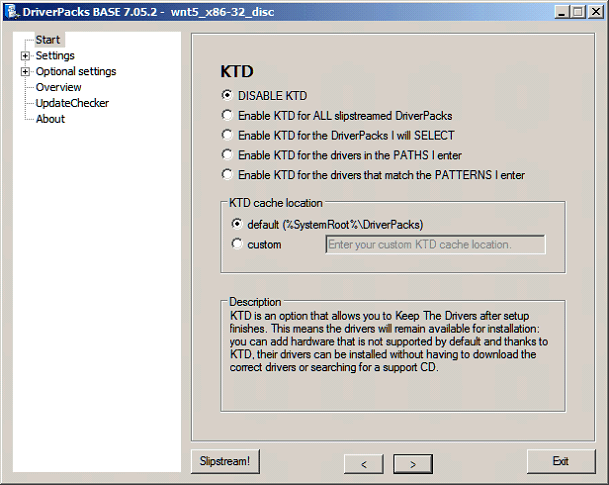
At Driverpacks' FAQ forum, you can find information about workable patterns.
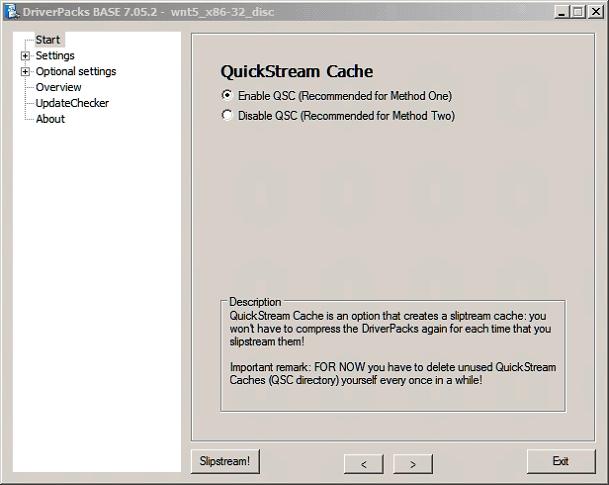
11) Next up is Quick Stream Cache options. Read the description.
Basically, the Quick Stream Cache speeds up the integration process for the NEXT time you use DP Base.
For DPsBASE releases 7.05.2 and earlier, please use QSC when you use Method 1. (To avoid critical Bug.)
For the avanced user;
Most team members give each interim "nightly" testpack a higher version number.
Suppose you have already used DPsBASE and then edit and recompress your modified driverpack. .
Well, if you are using DPsBASE 7.05.2 or earlier then you MUST first delete the corresponding QSC subfolder. You can leave the other folders in QSC cache.
Under normal circumstances, the released DriverPacks version numbering system will prevent an outdated cache from being used, but it is wise to delete it when test versions/updated testversion were downloaded and when you edit/recompress DriverPacks.
With DPsBASE 7.05.2 and earlier, if you gave the Mass storage Pack edit a higher version name, you should not stream a source you used Mass Storage Driverpack on before.
Load order is no issue, but removed drivers and removed sections are not cleaned up that well.
With DPsBASE 7.05.2 and earlier there is another peculiarity we recently discovered. Suppose you are using the very same Mass Storage Pack between slipstreams of the various Windows versions you have stored on Hard disk. You can slipstream all XP versions one after the other, and you will be fine, and the QSC cache saves time. HOWEVER. You should clear the QSC\Mass storage cache folder when you next want to slipstream a different Operating System.
Par Example; when you want to slipstream Windows 2000 after an XP slipstream, you should delete the Mass Storage sub-folders in QSC. That is also the case when you want to Slipstream Windows 2003 after XP (or 2000).
This affects all users who turn QSC ON. For Method one QSC had to be turned ON when you use Base7052 and earlier.
This is fixed in a new version of DPsBASE. Tests with the DPsBASE 804 betas no longer require that QSC is ON for Method 1, and OverFlow added on some other nice cool features.
The cleanup routine in 804 is a LOT better.
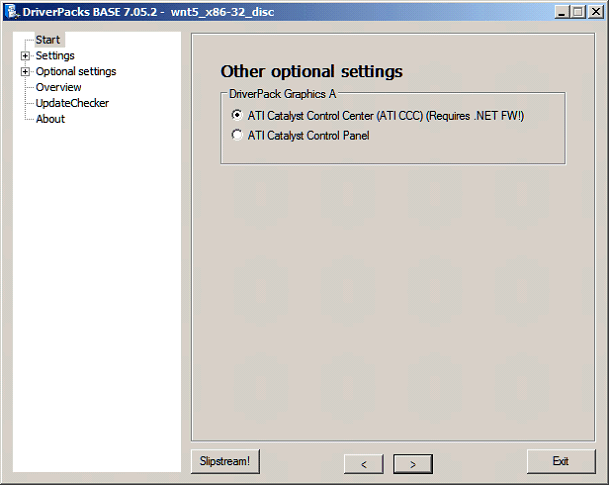
12) Now you can select between ATI Catalyst Control Center or ATI Control Panel integration.
ATI CCC integration requires .NET framework, otherwise the ATI CCC will not install properly.
Suppose you had removed .NET with NLite, then you can add the newer version of .Net Framework with RVM's update Pack.
OK, you made it this far. Almost there!
13) Now you get the option to verify your integration settings and export if desired. Press the right arrow button.
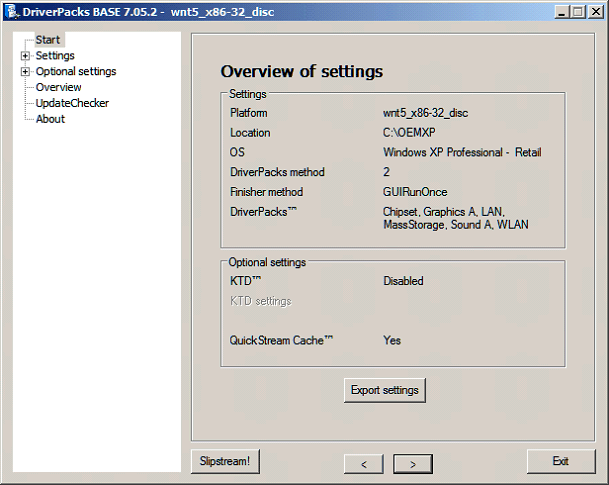
The settings.ini file will be automatically saved for a next run. For instance, after updates were downloaded you can run DPsBASE on the same source, and the settings you last used can be used. It will detect the updated DriverPacks releases just fine.
Exported settings can be useful, though. When you save them, use a good name.
14) Finally, the built-in Update Checker can tell you whether you are using the most up-to-date driverpacks. If it finds any new files, you can download them before you begin the integration.
Press the right arrow button.
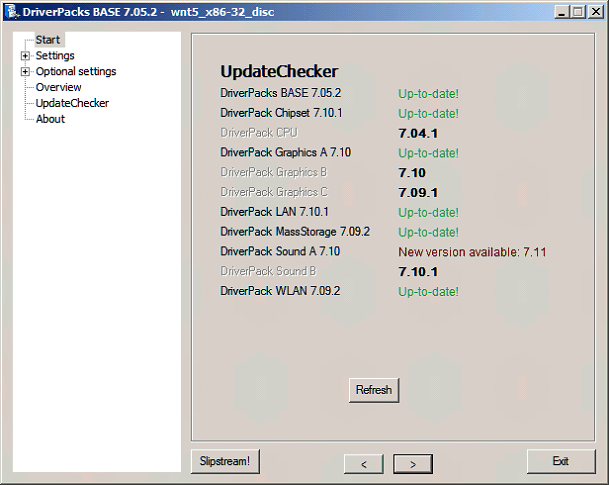
UpdateChecker does not look for 3rd Party DriverPacks.
When you see "Where did you get that?" on a Pack you are using a file with a higher version number than what is published.
Right, that can be your own modification, or a "nightly" Test Pack.
15) If all is ready. Mash that "Slipstream!" button and let 'er rip!
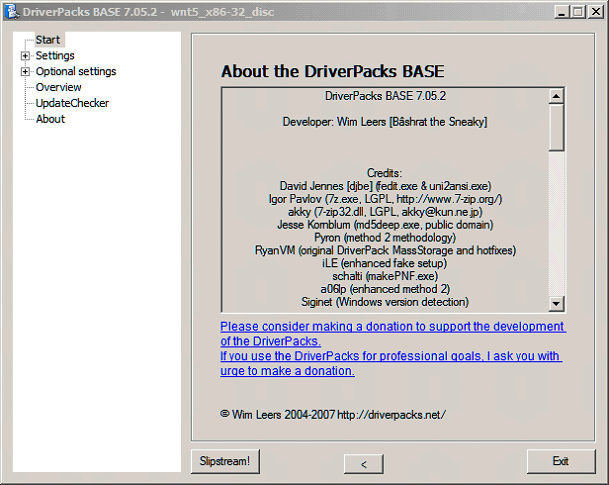
Depending on the speed of your PC and the number of driverpacks you are integrating, the slipstreaming process may take anywhere from 8-seconds to 5-minutes.
A comment; When you use Method 1, and you run DPsBASE the first time, it can take up to 40 minutes. It takes longer, uses more space, and the Path it writes in WINNT.SIF should not exceed 4096 characters.. But you can learn to love M 1 when you are in a real bind, or just need a Disc with searchable drivers.
As an aside. We are thinking about DriverPacks which will have shorter paths because we know a Method 1 slipstreamed DVD can be so awful useful.
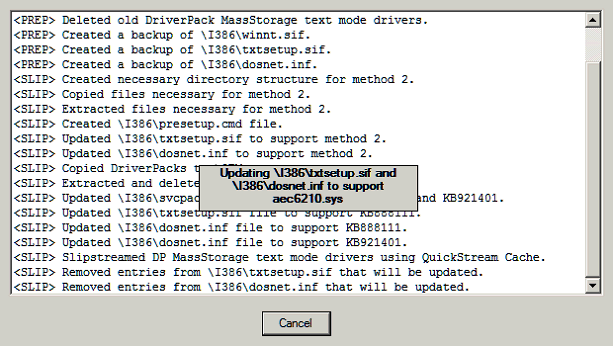
Be patient.
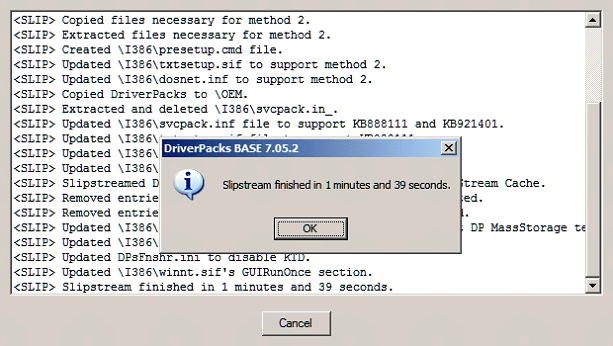
If all went well, then you can now use your slipstreamed and integrated Windows source and make an ISO file with nLite (Quite easy, and fast.) and use your Burning suite to burn the ISO.
You can also use the ISO to test the build in a Virtual environment (Virtual PC which is free, or VMWare).
Running it in a Virtual environment will show you whether the build works or not.
You can skip making an ISO and burn your slipstreamed and integrated source to a bootable Compilation (You will need a boot file and some know how.).
ISObuster is one of those tools that can get your boot files off the original source CD.
You'll use No Floppy emulation. The load segment of sectors (in hex) is 07C0 and sectors are set to 4 when you use your own boot file. :-)
Keep in mind that a virtual environment does not need special drivers, so even when a test in Virtual environment is successful you will not know if it installs properly on real hardware. A PC with a hard disk you can format without fear for loss of data is a good test machine. You can perhaps use a spare hard disk for tests.
We suggest you use Re-Writable media when you want to run trials on suitable PC hardware. Do not risk data on production machines. When you find trials have good result, you may want to burn to CDR or DVDR media since RW are UV light sensitive and deteriorate faster than Write Once recordables. But, RW are handy, you can re-use them when you made mistakes, or for other trials
You can have the misfortune that your build runs flawless on many types of machines and on the next you get an error.
If you run into any errors, search the DP forums before you post your problem. Chances are someone has already encountered the same problem you have and someone else has already found the solution.
Keep in mind we do want to hear about missing drivers and errors, or about fixes you made.
Please hit the subscribe button when you submit a post. You are not automatically subscribed, and would not get notified about a reply if you are not subscribed.
Help us help you! Your fix can be used for the next update, so you won't have to apply it again, and again, each time there is an update.
Only your feedback will make these driverpacks better than they are now .
When updates become available, you are advised to keep older versions of the utility or driver archives in a safe backup folder.
Old timers have a saying:" The newest driver is NOT always the best."
You need us? We need you! Your reports and REQuests for unsupported drivers will help.
(When you make a REQuest, please provide a link to the driver.)
We hope this tutorial was helpful.
If you feel Driverpacks are a worthwhile investment, please donate to the Project.
Quite a few of the team members spent hundreds of hours of hard work on this project, some of us also bought hardware to run live tests, and the server costs have to be paid as well.
I personally think it was worth my time, and hope you will show appreciation of what we try do for you..
We assumed that you understand the basics of creating an unattended Windows setup CD.
If you want to build an unattended setup CD, you can find excellent reading over at MSFN.org.
An NLite tutorial
Kind regards, Jaak.
Url to this pages:
http://nade.dk/web/nade/site.nsf/FramesetHP?readform&wmain=files/Slipstreaming_Windows